Porsche Macan Diverter Valve Upgrade
- February 28, 2019
- Automakers, Porsche, Products, Repair, More Categories...
- Posted by btyndell
- Comments Off on Porsche Macan Diverter Valve Upgrade
Mocksville, NC – Feb 28, 2019 /HBiPR

Overview
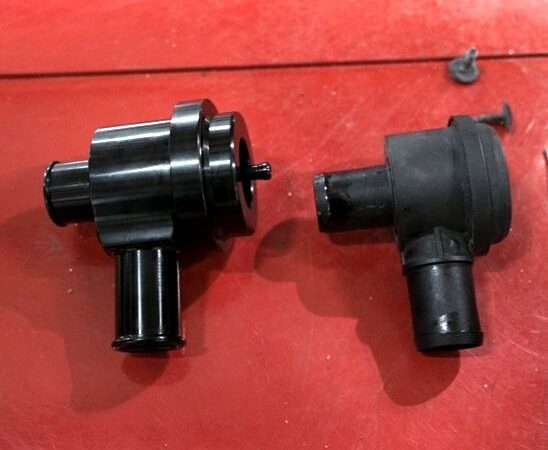
The Porsche Macan Diverter Valve upgrade replace the OEM plastic diverter valves that are prone to leaking boost with tuned Macans. This solution uses a 100% billet aluminum housing with a specific designed spring to match higher boost applications. These upgraded diverter valves will hold consistent boost pressure, maximizing power delivery along with recover much quicker enabling faster acceleration and smoother rapid shifts from the PDK.
Features
- Quicker turbo spool up
- Faster transition between gears
- Holds higher boost levels where the factory diverter valves fail
- 100% billet aluminum
- Tested on 500HP+ Macan Turbo
Installation
The diverter valves are 100% bolt-on and we can install in about 2 hours.
Designed For
- 2015+ Porsche Macan S / GTS
- 2015+ Porsche Macan Turbo
For quote or addtion information contact [email protected]
This guide is for Porsche Macan Diverter Valve upgrades, but can also be a guide for the front bumper removal on a 95b Porsche Macan.
 We always like to start from the top and make our way down. It is useful to have a lift for this project, but it is not necessary.
Tools needed are:
- Small Flat Head Screwdriver
- T25 Torx & T27 Torx / Driver
- Socket Wrench for Torx sockets
- Pliers for spring clamps
First open the hood and review what you need for removal. Start by removing the four clips that are at each corner of the plastic shield (red arrows in the picture.) To remove these clips, insert a flat-head screwdriver into the side of the clip and pry up the middle section. 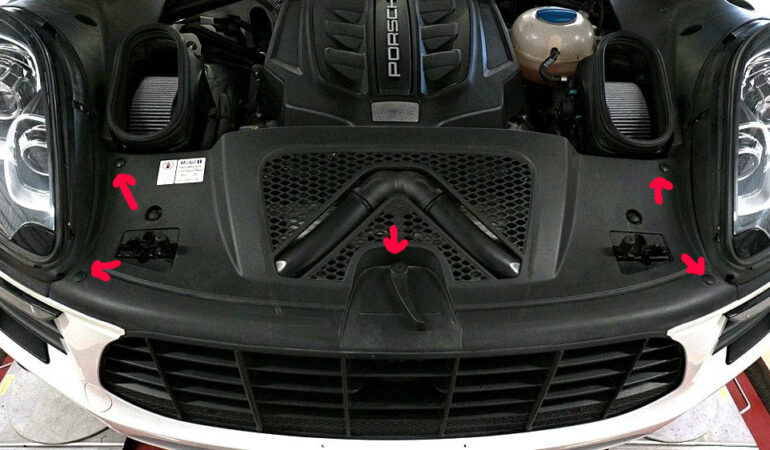
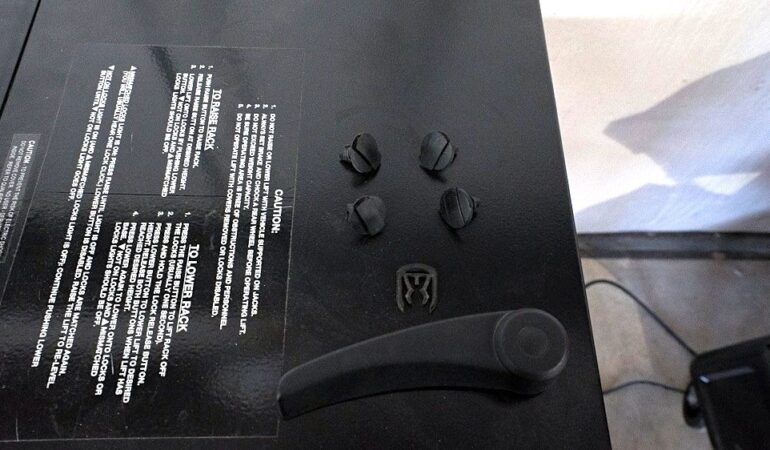
The Next Step is the remove the hood latch handle. To do this, you need to remove a slide clip that is holding the handle in place then wiggle the handle back and forth as you pull up. Not much force needs to be applied, but it might be a little tight.
Here is a picture of all the clips that need removal.
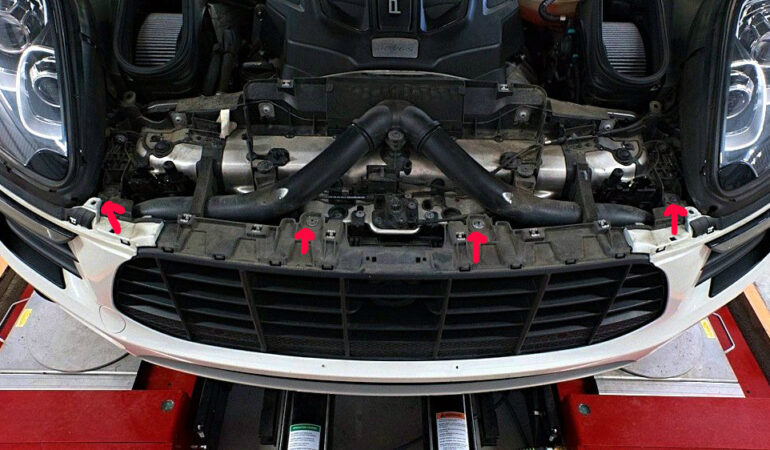
Now you need to remove the screws holding the top of the bumper. There are 2 T25 Torx screws and 2 T27 Torx screws. The T25 screws are the ones on the outside, and the T27 screws are the two on the inside. The T27 screws are reverse thread and will not fully remove from the bumper. Notate how far the T27 screws are screwed in for reinstall.
On the side of the vehicle under the headlight, there is a plastic panel. Two clips are holding this on. Remove the two clips the same way you did on the top panel. Once you remove the clips, remove the plastic panel. The panel is snapped in on the underside, so pull up. Do the same on the other side.
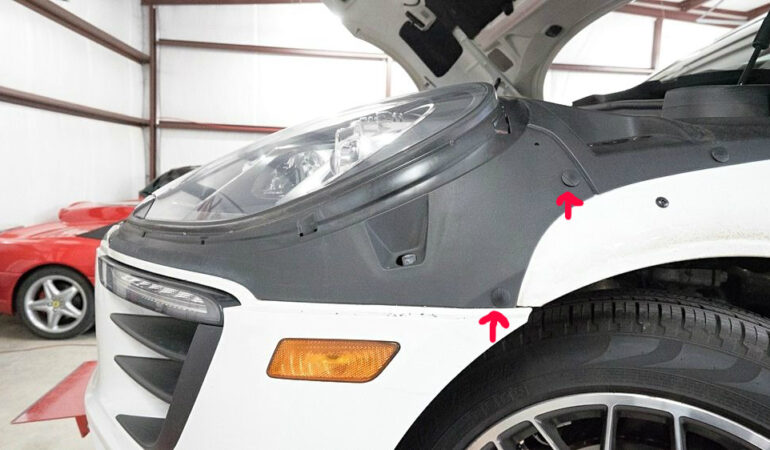
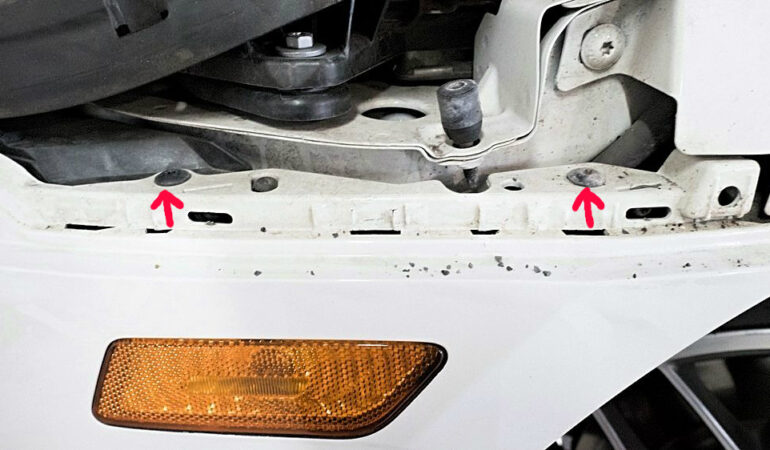
Now you have access to 2 more T25 screws. Remove these. Do the same on the other side.
Start the vehicle and turn the wheel to the opposite side you are attempting to reach. You now have access to the 4 T25 screws that hold on the fender liner. Remove the four screws that hold in fender liner. Use your fingers or a small screwdriver to pry the fender liner out from the bumper. Do the same on the other side.
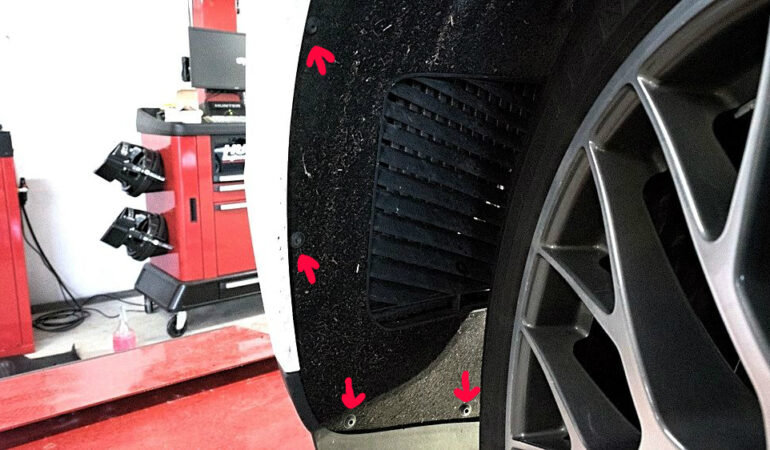
Porsche Body Panel Bolt location
Once the fender liner is out of the way, you will see a black bracket. 2 T25 screws are tucked into two pockets. Remove the two screws. Do the same on the other side.
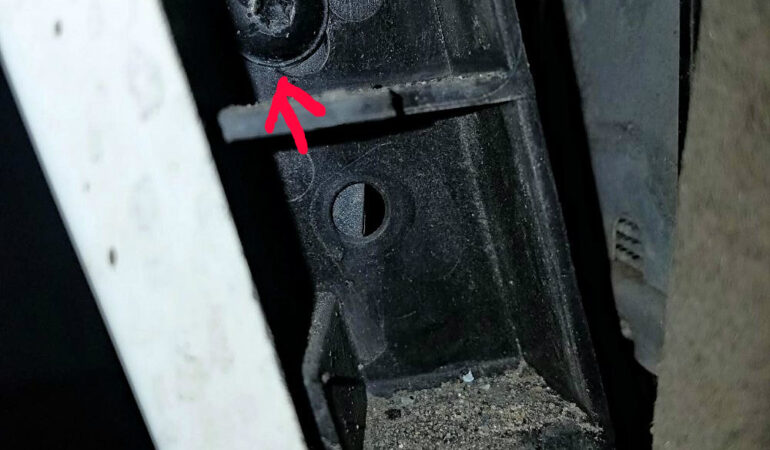
Move down to the underside of the vehicle and remove the (13) T25 screws and two clips holding the under panel on. You do not have to remove the panel completely, but it does improve access. Seven bumper tabs are held on by T25 screws, five are visible, and two are under the side under the panel.
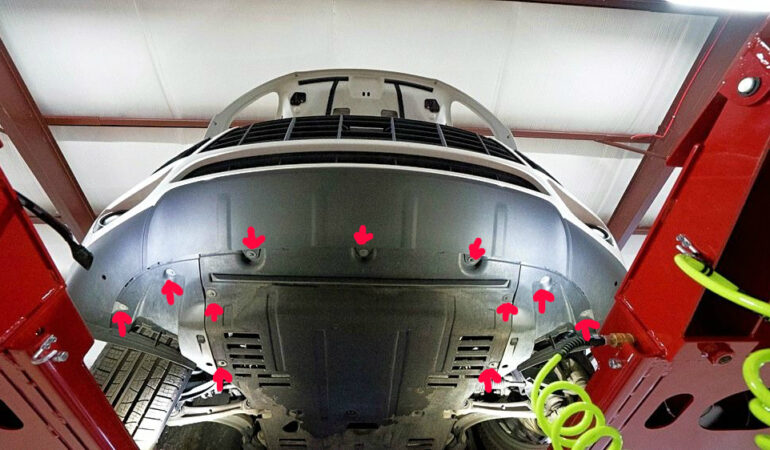
On the passenger side, two connectors are located in the fender well. Unplug both connectors; They can be tight from all of the dust/rocks/dirt that gets stuck in the connector.
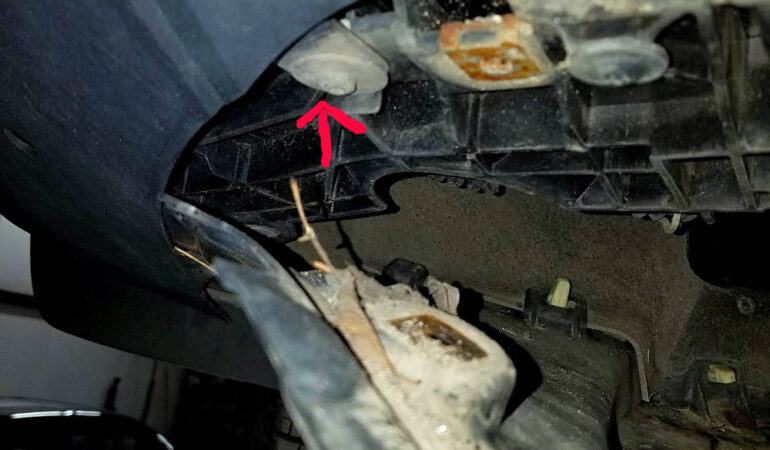
Underside body panel – Porsche
Everything is now removed to remove the bumper. Slide the bumper forwards, and it will come off. Some help will make this much easier.
Now that you have removed the bumper, you have access to the diverter valves. They are located towards the bottom on the left and right-hand sides.
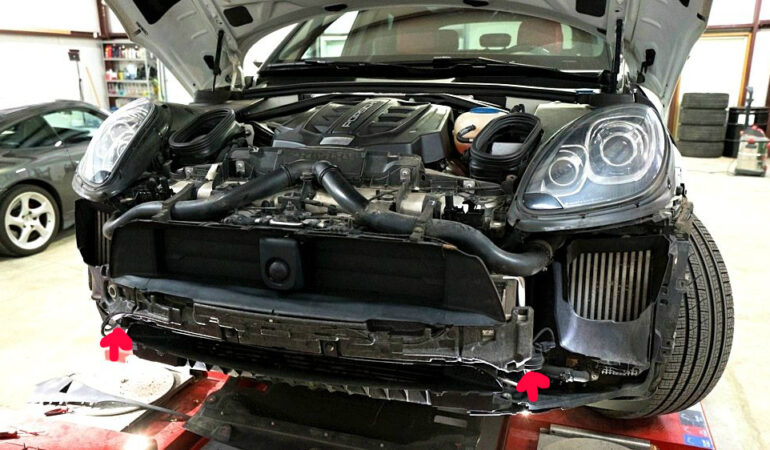
This is a pretty straight forward swap out. Remove the small hose on the front of the valve. You need to squeeze the clamp on each hose and slide it back. Using a pick or screwdriver to wedge between the hose and the valve makes the hose removal easier. Remove the valve and spring clamps. The Valves come with worm clamps to replace with spring clamps, and I recommend using these for two reasons. One you are never supposed to reuse a spring clamp, and two, it is much easier to install using the worm clamps. Choose which spring you want, I went with yellow, and unscrew the top of the valve and replace spring. The valve unscrews from multiple points, so make sure everything is screwed on tight, even the nipples on the sides. Install the valves the same way you removed them.
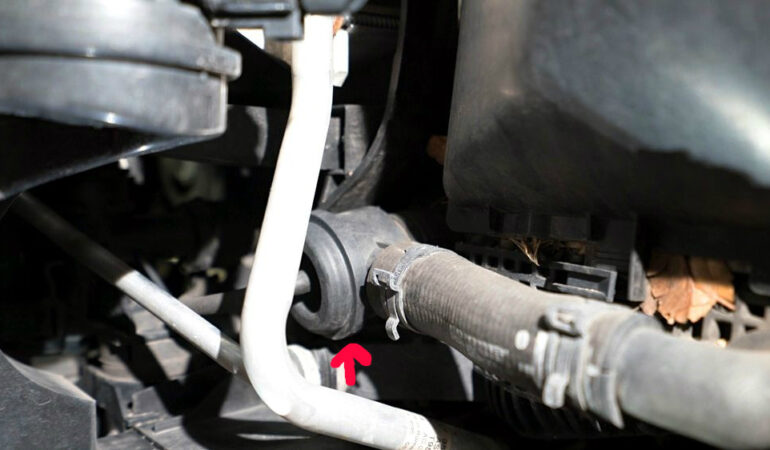
Reverse the steps prior and install the front bumper back on the vehicle. Make sure to plug the lighting connectors back in and install all screws in their correct place. It is easier to line everything up with a second set of hands when reinstalling the bumper.
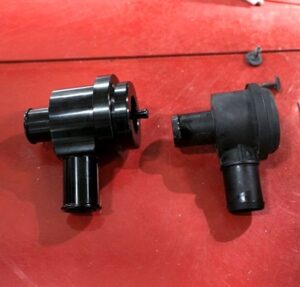
With the Porsche Macan Diverter Valve upgrade we noticed a little bit of sound difference and the Macan holds boost better when shifting.
Resources:


